CAPTURING/RECORDING |
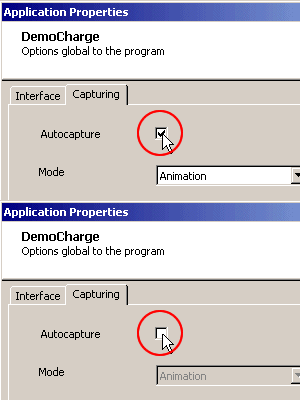
Smart auto-capturing by detecting screen changes, menu actions, and mouse clicks and movements |
|
| With a couple clicks of the mouse, you can automatically capture and record the use of any application or desktop activity on your entire screen, or within a window or specificed region including all visible mouse movements, keyboard strokes, graphics, menus, and much more. |
 |
Manual recording |
|
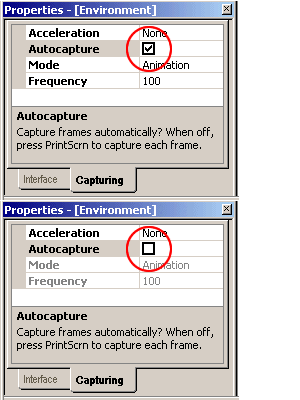
| Record only specific actions or desktop activity required for a particular demo by using the PrintScrn key on the keyboard. |
 |
Capture full screen, window, or region |
|
- Screen capture: Choosing the screen capture mode will automatically record all of your on-screen activity, including the entire desktop, images, mouse movements, and applications that are currently running or started during the capturing process.
- Window capture: Use this mode to capture individual windows within an application such as wizards and dialog boxes, or to pinpoint options within drop-down menus.
|
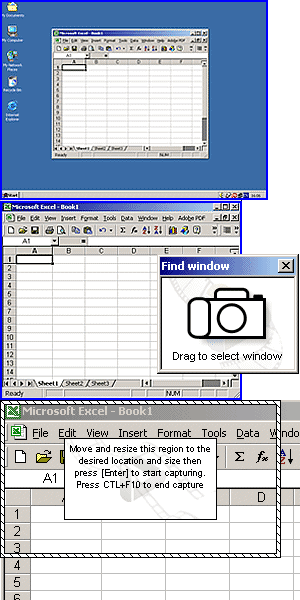 |
- Region capture: Manually define the size and position of the recording window by simply dragging-and-dropping the region box outline to correspond with the size of the area you want to capture. Use this mode to capture an entire application resized to a smaller size than the whole screen (desktop).
|
|
Background mode |
|
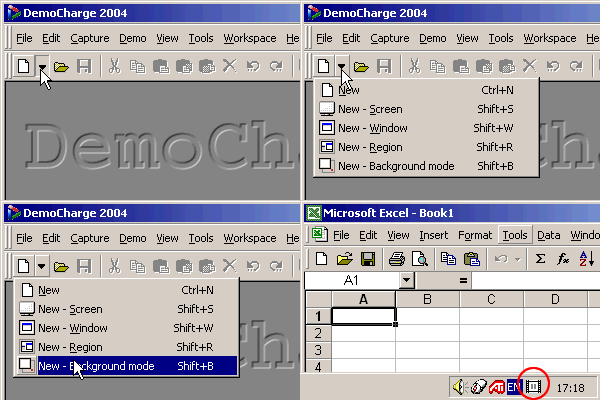
| Unobtrusively run DemoCharge on your machine in a "waiting mode". When you're ready to start capturing the current application, simply right-click the blue button at the bottom right of your desktop or use the keyboard shortcuts to activate your desired caputure mode. |
 |
Full-motion recording, including mouse cursor movement |
|
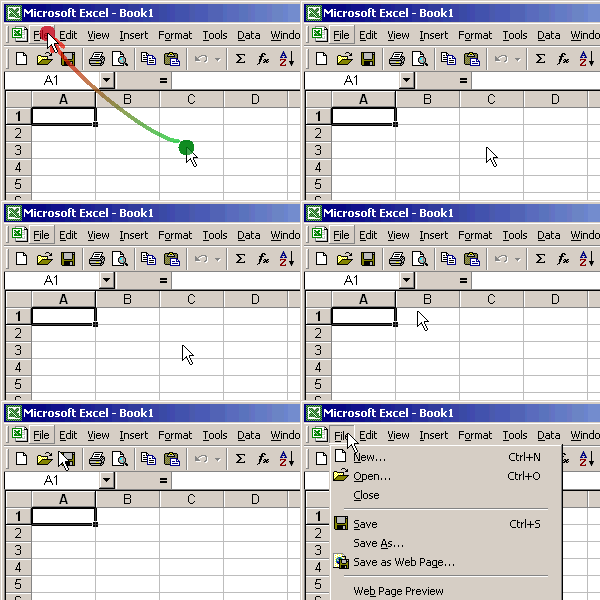
| Use "animation" recording mode to create convincing demos that reproduce the full capabilities of an application or simulate common tasks. DemoCharge records all on-screen actions, including mouse movements. DemoCharge makes it easy use the recording option - animation or presentation - that best fits your demo creation needs. |
 |
Action-based recording |
|
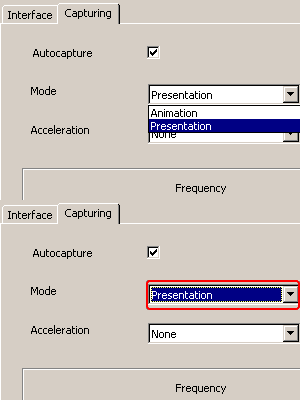
| Use "Presentation" recording mode to record only user-initiated actions, such as keyboard and mouse clicks, but not screen changes. This mode is best for capturing on-screen presentations, as it captures smaller number of frames and therefore creates smaller file sizes of your demos. |
 |
Ability to capture and append additional frames to existing demos |
|
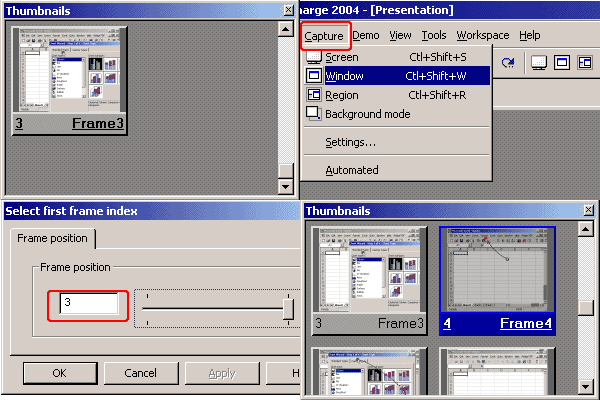
| Record and insert additional frames into existing demos. This eliminates the need to re-capture an entire demo to insert new frames, correct errors, or make changes. |
 |
OUTPUT
|
Animated GIF output (DemoGIF) with optimal compression, suitable for emails |
|
| Output your demo in the DemoGIF format for a small file size that makes viewing and sharing your demos easier than ever. DemoGIF is the ideal format for emails, Web content, documents, tutorials, and training and help materials. |
 |
Flash (SWF) output (Professional version only) |
|
Generate your demo as a SWF file, the file format used by Macromedia Flash to deliver graphics, animation and sound over the Internet. DemoCharge will automatically generate the Flash file with one mouse click.
|
 |
Java Applet output (Professional version only) |
|
Output a Java applet demo that offers almost all capabilities of Flash, though with minimal file sizes that can be quickly downloaded and run from a web browser.
|
High output compression (small file sizes) without loss of original quality |
|
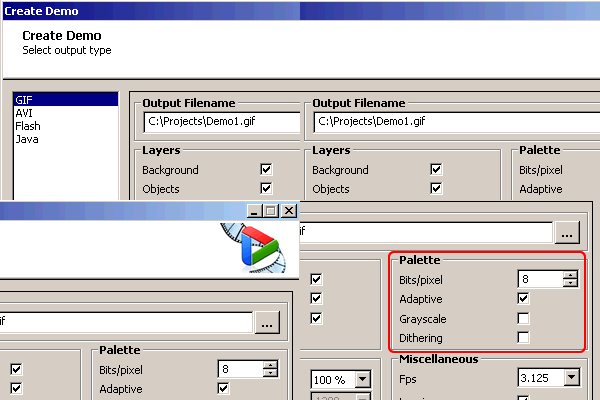
| The generated demos are compressed to ensure small file sizes without loss of quality. This makes viewing demos online or offline or sending them in email a snap! |
 |
Resizable output - create demos in multiple resolutions |
|
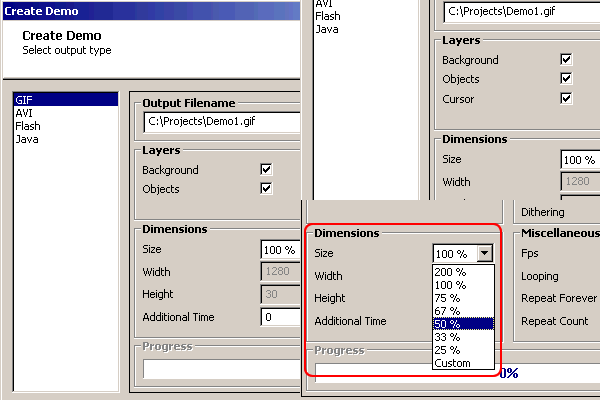
| Resize your demos height/width ratio to fit the size need of your final DemoGIF, Flash or Java Applet output. This is ideal to ensure that full screen demos can be viewed without the viewer having to scroll up and down or sideways in their browser. |
 |
Generated demos can be viewed on any computer independent of the Operating System |
|
| Generated demos can be viewed on any computer, independent of the Operating Systems (Windows, MAC, Linux, etc.) |
EDITING
|
| Intuitive and easy to use GUI |
|
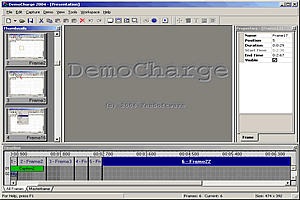
| The DemoCharge workspace is entirely customizable, requires no IT skills, and allows you to easily and intuitively work with your projects. |
 |
Thumbnail view |
|
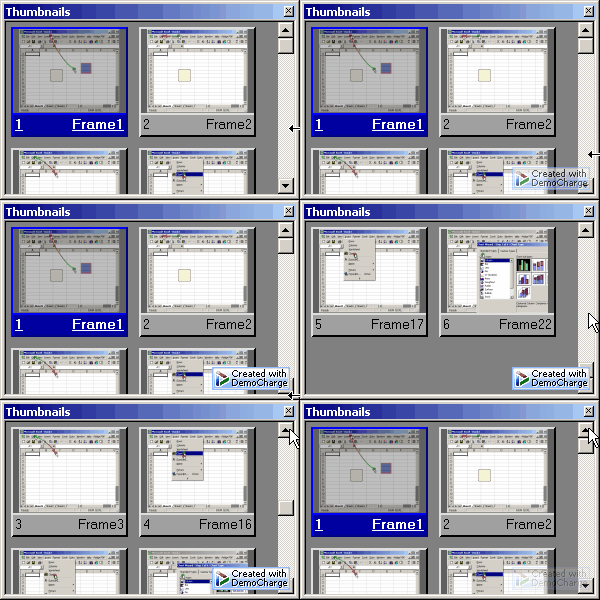
| Recordings appear as a series of manageable individual frames viewed as thumbnail images in your workspace. The Thumbnail view displays every frame in your project so that you can re-order frames, delete frames, record and insert new frames, or double-click a frame to edit it. |
 |
Timeline view for time-based frame and effect manipulation |
|
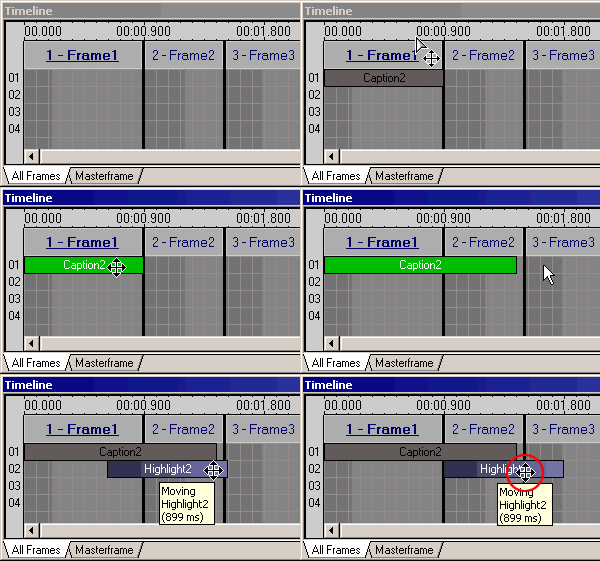
| The Timeline panel enables you to review and modify the timing of each individual frame and effects in your project. This powerful feature lets you visually see the layout of the menu across time. It is also great for managing captions and effects across multiple frames. |
 |
Properties panel |
|
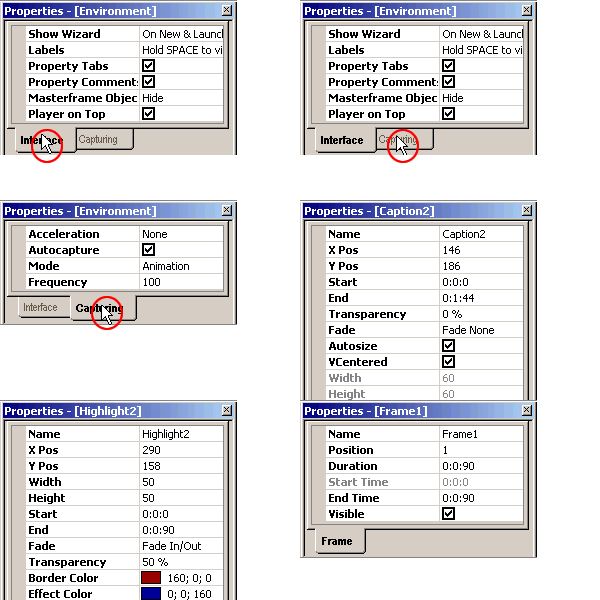
| The Properties panel is where you configure the DemoCharge application, individual frames, and special effects that you add to your frames. Each time a property is selected a short description of that property is displayed in the bottom of the panel with an easy-to-understand explanation. |
 |
Preview mode via internal demo player |
|
| The Preview mode is an easy way to preview a demo before it is generated. You can instantly view your demo as it would look in the final output and make appropriate changes. Once the preview has been viewed and any desired edits have been made, you can then generate the demo in any of the supported outputs formats. |
 |
Customizable workspace |
|
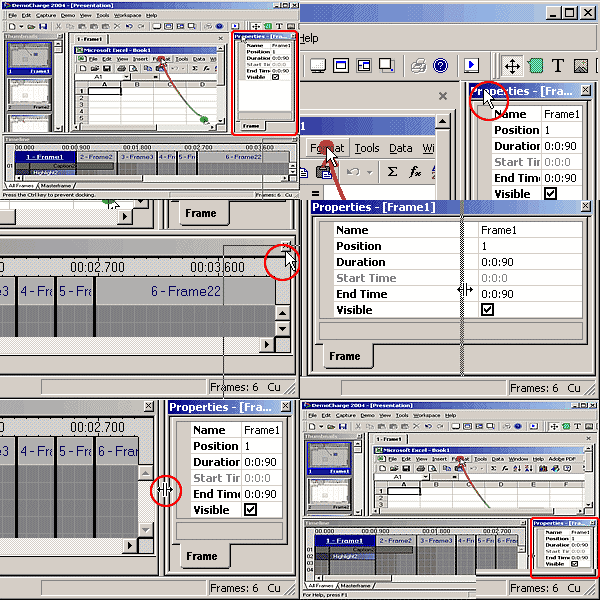
| The DemoCharge workspace (application layout) lets you origanize your working space so that you can work with DemoCharge the way you like. Pick what windows and toolbars appear in the workspace, choose between the thumbnail and filmstrip view of frames, docked or free floating panels, etc. Then save your workspace for future use. |
 |
Masterframe |
|
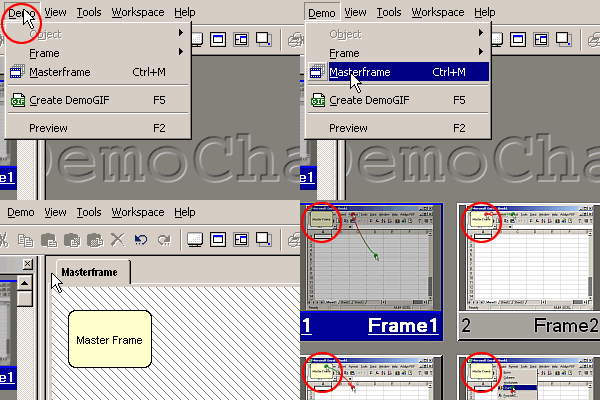
| If you need to display information such as logo or copyrights across the entire demo - or simply want the world to know you created this amazing demo - you'll need to put that information in the MasterFrame. Text and special effects placed within the MasterFrame are visible across the entire demo, as if they were added to each individual frame. |
 |
Cut, copy, paste, and duplicate frames and effects |
|
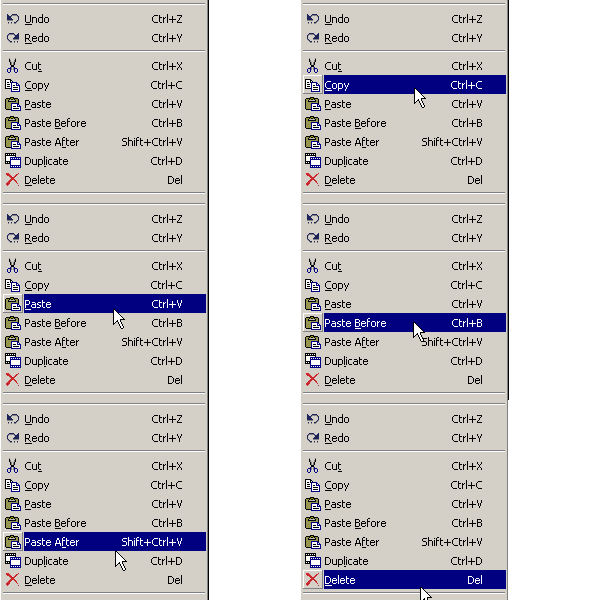
| Use these time saving features to move, re-order, or re-use frames and effects in your project, eliminating the need to re-capture a project or individual frames. |
 |
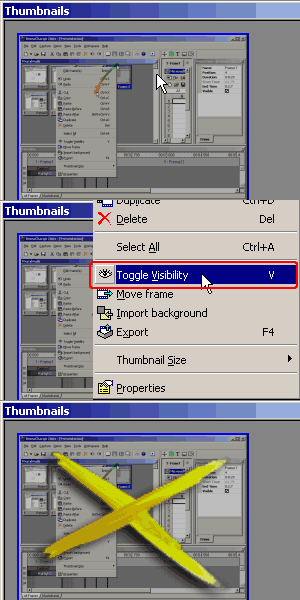
Hide frame |
|
| Choose exactly which frames to include in your final demo. This is a handy feature for saving a frame in a project for later use. Instead of deleting the frame you can hide it so that it does not appear in the generated demo. If you later decide the frame is needed it can be inserted and does not have to be re-captured. |
 |
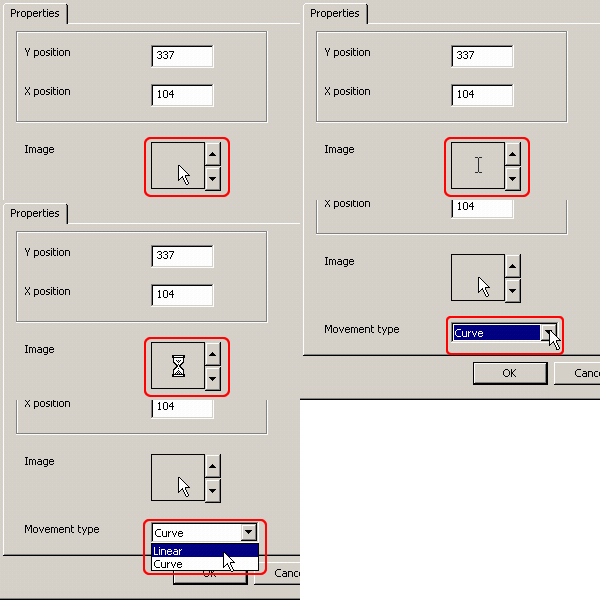
Customizable mouse cursors and tracks |
|
| Customize the mouse pointer image, movement style, and the path of mouse movements. If your demo does not need to show mouse activity, simply choose to hide all mouse movements when creating the final output. |
 |
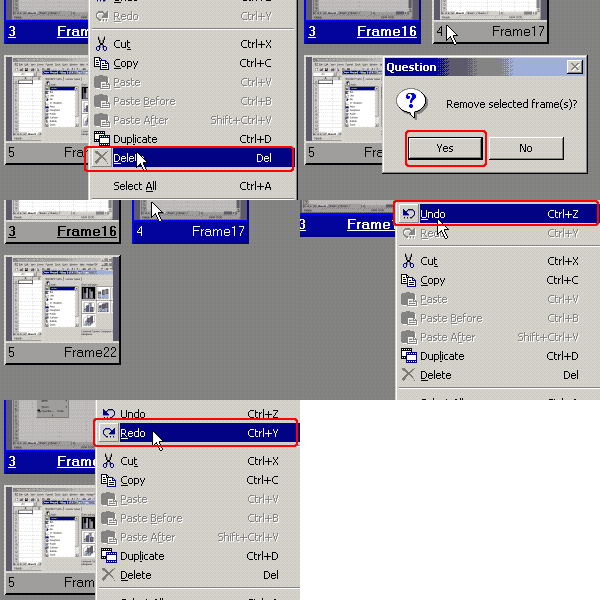
Full undo/redo management |
|
| Multiple-level undo/redo allows you to quickly restore one or more editing changes to a project. |
 |
EFFECTS & CAPTIONS
|
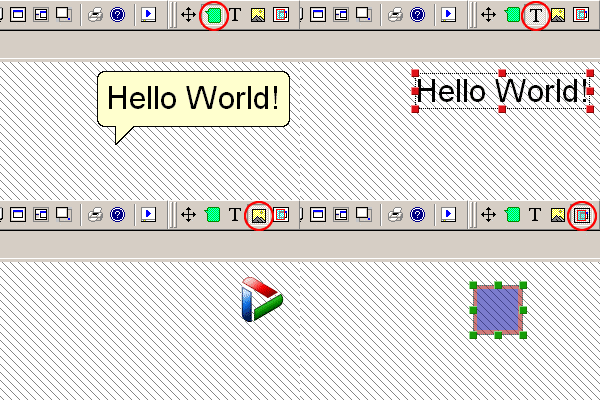
| Balloon, caption, image, and highlight effects |
|
| After you record your demo, enhance it using the professional editing features in DemoCharge. These features enable you to easily customize your demo - frame-by-frame - by quickly adding captions within one of the many predefined balloon shapes, images, buttons, and highlights to draw attention to important points. |
 |
Effects can be extended across multiple frames |
|
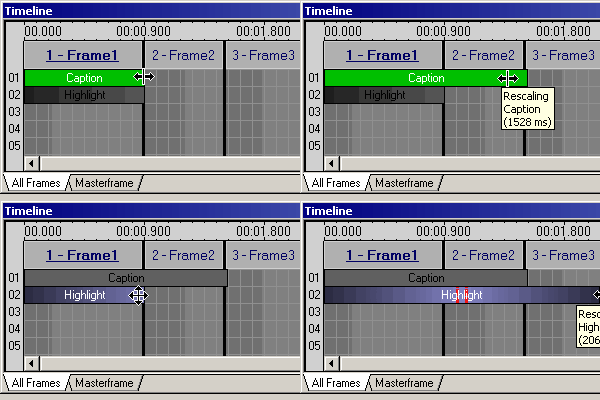
| An effect placed in a single frame can be resized to extend into multiple frames, eliminating the need to re-insert the same effect numerous times. You can visually change the duration of an effect by highlighting the effect and dragging it to the desired size from within the timeline panel. |
 |
Effects can fade-in and fade-out |
|
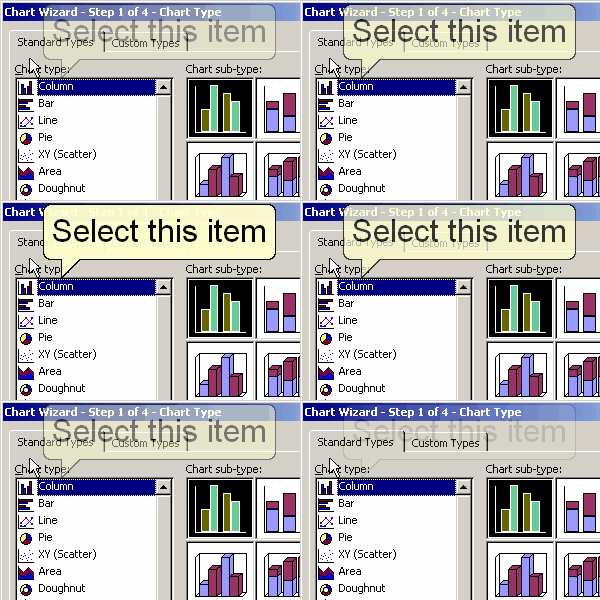
| Use compelling motion picture style fade-in/out effects to transition between frames that begin a new topic within your demo, or add a dramatic opening or closing to your demo. |
 |
OTHER
|
Import, export and print individual frames |
|
| Import and export frames for use within multiple demos, eliminating the need to re-record. Print individual frames to add a persuasive document to a proposal or report. |
 |
No technical or programming skills required |
|
| DemoCharge puts demo creation into the hands of the masses. Programming skills are not required. DemoCharge enables anybody to create high-impact animated demos in minutes - from the casual computer user to technical support, to sales and marketing professionals, and the skilled developer. |